
Turn a storyboard into consistent AI video scenes
Turn storyboards into reviewable Infiknit AI video scenes while preserving shot order, references, frames, and continuity notes.
 Luca MarinAI Video Editor
A storyboard is a sequence of decisions, not a list of mood words. Each panel should say who or what is visible, what action happens, where the camera is, and how the shot ends. Infiknit keeps those shot briefs, references, frames, clips, and review notes connected on a canvas so the sequence can be tested one scene at a time.
AI storyboard video, consistent storyboard shots, and AI scene planning canvas share this page because they ask how to turn panels into reviewable scenes without losing continuity.
Short answer: Give each storyboard panel one shot brief, one reference pack, one action, and one endpoint. Build the first scene from the clearest panel. Review character identity, product geometry, camera direction, and final frame before moving to the next scene. Reuse accepted frames as references, not uncertain renders. Keep scene branches separate so a change in one shot does not silently rewrite the whole sequence. A storyboard can organize continuity; it cannot guarantee stable motion, lip sync, or provider output.
What belongs in each storyboard panel?
Answer in practice: Start with three panels: setup, action, and resolution. Write each as a separate Text node with one subject, one action, one camera direction, and one endpoint. Attach only the character, product, or setting reference required by that shot. Generate the setup first and check identity, scale, and lighting. Use its accepted frame to inform the action, then use the action’s accepted endpoint to plan the resolution. Record continuity notes such as “same wardrobe,” “camera moves left,” or “product remains on table.” If one scene fails, repair that panel rather than regenerating every scene. Keep accepted frames and rejected candidates visible so the next scene starts from known evidence. A storyboard organizes decisions and handoffs; it cannot guarantee stable motion, lip sync, or provider output, so every scene still needs a frame-level review.
What storyboard-to-video planning solves
Storyboard planning turns a long generation into smaller reviewable shots. The canvas shows which frame is approved, which reference carries identity, and which scene still needs repair. That makes continuity a visible decision rather than a hope that the model will remember the previous shot.
Scene handoff notes
For every accepted scene, record the final frame, subject position, camera direction, lighting, wardrobe or product details, and intended next action. Start the next scene from that evidence. If the transition is too difficult for a single generation, use a cut between two stable moments. A clean edit is often more consistent than an extended render.
Separate continuity anchors from shot presentation in every panel. Continuity anchors include character identity, product geometry, wardrobe, screen direction, and the outgoing frame. Presentation includes crop, background detail, lens feel, pace, and caption space. Writing both lists in the panel keeps a later scene from inheriting an accidental choice as if it were story canon.
Build the smallest useful node graph
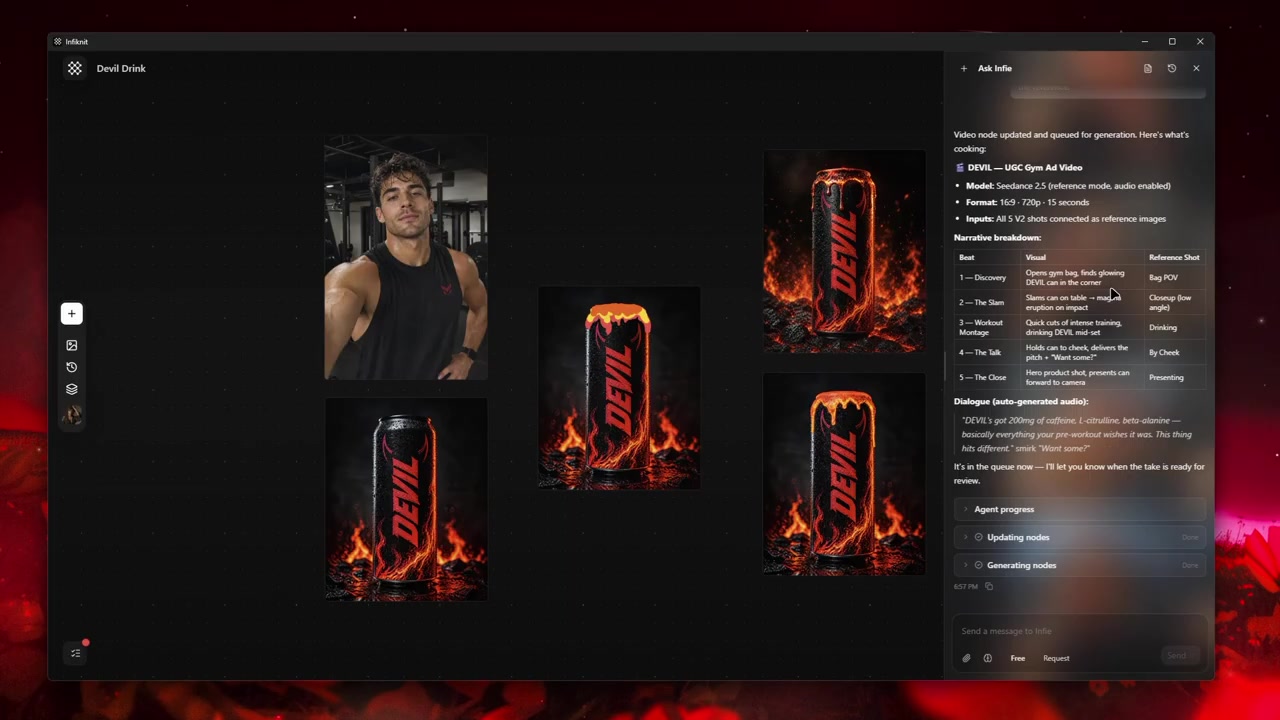
Use five responsibilities per scene: panel brief, reference pack, candidate shot, accepted handoff frame, and next-scene branch. Keep scene branches separate. A change to panel two should not silently replace the accepted frame that panel three uses.
1. Turn each panel into a shot brief
Write subject, visible action, camera direction, duration, and endpoint. Add one acceptance condition such as “same blue jacket and product remains on the table.” Do not use a panel as a mood board without an action that can be reviewed.
2. Build the setup scene first
Generate the panel with the clearest identity evidence and the least complex movement. Check scale, lighting, and screen direction. Its accepted final frame becomes the source for the next panel; an uncertain render does not.
3. Carry only accepted continuity
Pass forward the approved frame, reference pack, and handoff note. State what must remain fixed and what the new panel may change. If the outgoing frame is not usable, repair that scene or insert a deliberate cut.
4. Review each scene independently
Check the first, middle, and final frames, then compare the outgoing and incoming frames together. A sequence can have attractive individual clips and still fail at the handoff; record that failure against the panel that caused it.
5. Lock the sequence only after review
Name accepted shots by panel and purpose, keep rejected candidates with a specific reason, and assemble the sequence from accepted branches. This makes a continuity repair local instead of forcing a full regeneration.
Decisions to record before generation
| Decision | Review question | Canvas evidence |
|---|---|---|
| Panel brief | What does the viewer see, and where does the shot end? | Subject, action, camera, duration, and acceptance condition. |
| Reference pack | Which identity and setting traits must persist? | Labeled references with continuity notes. |
| Handoff | Which outgoing frame starts the next panel? | Accepted still, timestamp, and next-action note. |
| Scene review | Does the candidate hold identity at start, middle, and end? | Frame checks plus adjacent-scene comparison. |
| Sequence lock | Which branch is approved for the cut? | Panel name, accepted candidate, and rejection reasons for alternatives. |
A model name alone is not a strategy. One branch may require a different input mode, duration, resolution, or reference count from another. Infiknit filters controls using enabled models and validated providers, so the current capability surface must be checked before a queue begins.
Worked example
Consider three panels for a product demo: hand approaches the box, lid opens, product is held front-on. Give each panel one brief and keep the box and hand references visible. Approve the first panel's final frame before generating the lid action. Use the action's final frame only if the product geometry and label are still clean. If the hold shot needs a different crop, branch presentation from the accepted product frame instead of rewriting the whole sequence.
Preserve the strongest candidate as a branch. Do not overwrite the only useful output while testing another direction. When turning a storyboard into video scenes, a branch is evidence: it shows which choice produced which result. Connect the approved candidate to the next media or refinement node. Save a reusable Character, Product, Style, or Background reference only after reviewing it at full size.
Review the artifact both as a final candidate and as an input. A still can look coherent in a thumbnail while hiding text or geometry problems. A video can move smoothly while changing the subject. A trim can remove the setup needed by the next shot. Queue downstream work only when both reviews pass.
Quality-control checklist
- Write the desired outcome in plain language.
- Keep the original source beside every derivative.
- Name nodes by responsibility rather than automatic ID.
- Change one major variable at a time.
- Verify model support for every connected input.
- Review product, character, text, and brand details at full size.
- Save references only after human approval.
- Record which candidate was accepted and why.
- Keep failed outputs when they explain a boundary.
- Save a Blueprint only after the graph works.
Record measurable settings such as 1080p resolution or 24 fps when the media type supports them.
Failure modes and honest limits
Boundary 1: Video modes differ by provider. Return to the last verified node, inspect its source and settings, and rerun only the uncertain branch. A useful process states this limit before a creator spends time or provider credits on an unsupported path.
Boundary 2: Motion control is model-dependent. Return to the last verified node, inspect its source and settings, and rerun only the uncertain branch. A useful process states this limit before a creator spends time or provider credits on an unsupported path.
Boundary 3: Continuation depends on its source. Return to the last verified node, inspect its source and settings, and rerun only the uncertain branch. A useful process states this limit before a creator spends time or provider credits on an unsupported path.
Boundary 4: Provider completion is not guaranteed. Return to the last verified node, inspect its source and settings, and rerun only the uncertain branch. A useful process states this limit before a creator spends time or provider credits on an unsupported path.
How Infiknit supports the method
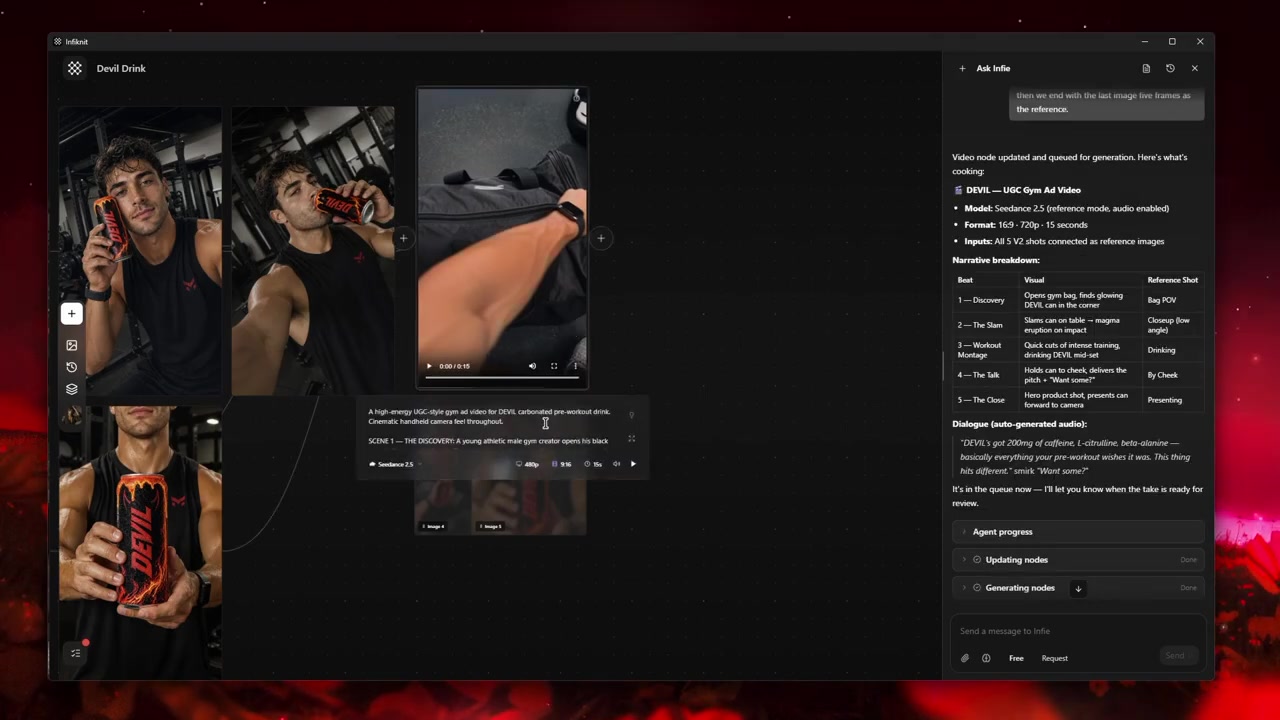
Infiknit keeps working evidence for AI storyboard to video tool in the canvas. Canvas projects preserve nodes, groups, viewport state, titles, and durable media references. Generated or uploaded media can become downstream inputs. Style, Character, Product, and Background assets can return as reference nodes. Eligible Image, Video, and Video Trim nodes can run directly or through a dependency graph.
The internal agent can create, update, connect, disconnect, delete, read image nodes, and queue eligible nodes through validated frontend tools. It cannot directly edit pixels or operate Audio or Audio Trim nodes. It cannot generate a complete campaign through one broad command or synchronously wait for every provider result. Visible tool results and canvas state are the proof of completed work.
FAQ
What belongs in each scene handoff?
Keep the shot purpose, subject and product references, camera direction, action, duration, transition, and acceptance note together. A scene handoff should tell the next creator what must remain fixed and what may change.
How do you check continuity between scenes?
Compare the outgoing and incoming frames for subject identity, wardrobe or product details, camera position, lighting, and screen direction. Fix the storyboard note or reference before generating another scene when one of those anchors drifts.
How many panels should an AI video storyboard contain?
Use one panel for each meaningful change in action, camera, or location. Three panels—setup, action, and resolution—are a practical first test. Split a crowded panel when it contains two different endpoints or when a continuity failure would be hard to isolate.